
Field Pea
Field pea is well adapted to direct seeding or reduced tillage systems. For best results, follow the recommendations in this section on selecting a site, seeding management, residue management, and fertilization. For control of weeds, please seed Weed Control.
Field site selection is key when planning for field pea in the rotation.
| PLAN AHEAD |
|
| CHOOSE |
|
| AVOID |
|
| MAINTAIN GOOD RECORDS |
|
PLAN AHEAD |
|
CHOOSE |
|
AVOID |
|
MAINTAIN GOOD RECORDS |
|
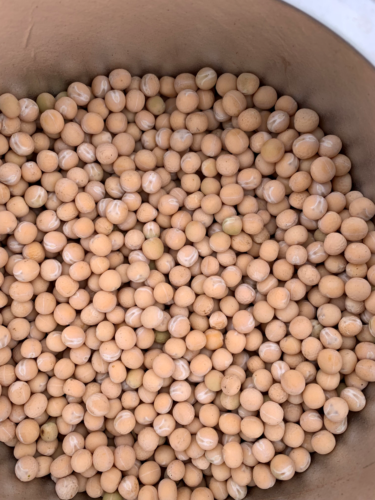
Field Pea Seeds
| SEED |
|
| SEEDING DATEs |
|
| SEEDING DEPTH |
|
| SEEDING RATE CALCULATOR |
|
| SEEDING RATES |
|
| SEEDS PER POUNDS |
|
| SOIL TEMPERATURE |
|
SEED |
|
SEEDING DATEs |
|
SEEDING DEPTH |
|
SEEDING RATE CALCULATOR |
|
SEEDING RATES |
|
SEEDS PER POUNDS |
|
SOIL TEMPERATURE |
|
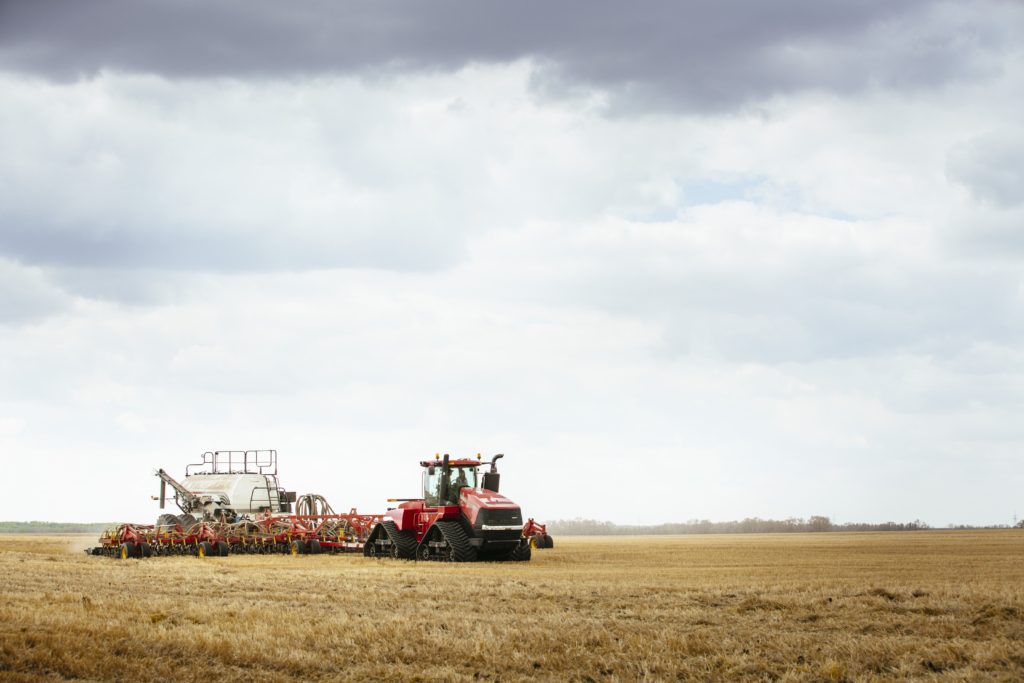
| TYPE OF EQUIPMENT |
|
| GROWTH STAGES | To understand the growth stages of the Field pea, refer to Field Pea Growth Staging Guide. See Weed Control for correct application of herbicides. |
TYPE OF EQUIPMENT |
|
GROWTH STAGES |
To understand the growth stages of the Field pea, refer to Field Pea Growth Staging Guide. See Weed Control for correct application of herbicides. |
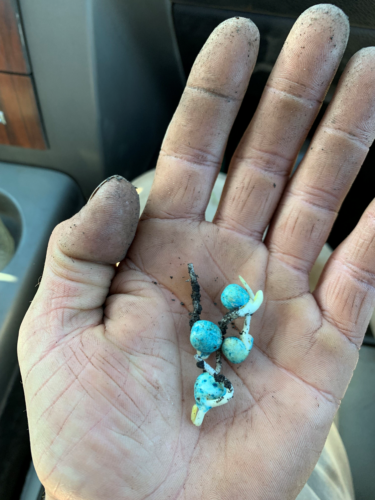
Germinating Pea Seed
| GERMINATION TESTING |
|
| VIGOUR TESTING |
|
| VARIABLES IMPACTING SEED QUALITY |
|
| COMBINED TESTING |
|
| EVALUATION |
|
GERMINATION TESTING |
|
VIGOUR TESTING |
|
VARIABLES IMPACTING SEED QUALITY |
|
COMBINED TESTING |
|
EVALUATION |
|
The pea seed consists of the seed coat (testa), the seed leaves (cotyledons) and the embryo axis. The seed coat encloses and protects the cotyledons and the embryo axis (the two cotyledons protect the embryo axis and provide nutrients during establishment). The embryo axis is comprised of a rudimentary root (radicle) and a shoot (plumule).
| FALL PRIOR |
|
| DIRECT SEEDING CONSIDERATIONS |
|
| ROTATIONAL PLANNING |
|
FALL PRIOR |
|
DIRECT SEEDING CONSIDERATIONS |
|
ROTATIONAL PLANNING |
|
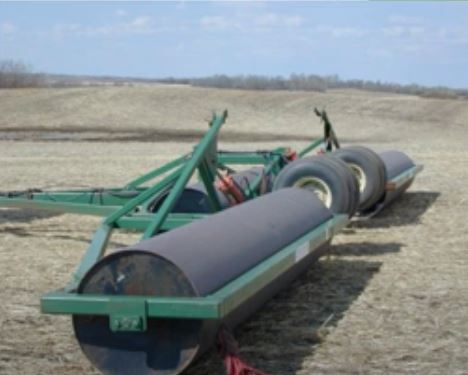
Land Rolling
| PURPOSE |
|
| IDEAL TIMING |
|
| AFTER THE 5TH NODE |
|
| WATER BALLAST |
|
| HEADLANDS |
|
| RESOURCES |
|
PURPOSE |
|
IDEAL TIMING |
|
AFTER THE 5TH NODE |
|
WATER BALLAST |
|
HEADLANDS |
|
RESOURCES |
|
Special thanks to Saskatchewan Pulse Growers.
Find More Information About Field Pea – Seeding